
Inventory counts – how to count a branch from the phone and export to your ERP
TL;DR
A manager prepares the catalog, a branch and an active count (session). Workers tap Start Scan on the phone and scan. The manager follows progress on the count-scope card and in Overview, finishes the session, reviews the data in Recent Counts and exports a summary to Excel or straight to the ERP. Every saved scan costs one credit.
Who this is for and when
Inventory counting is OpticCount's core module and is included in every license. The company manager prepares the count and exports the result; employees and sub-managers count in the branches they are assigned to. Use it for the annual count, for a sample count by supplier or category, and for routine counts of one area of the warehouse.
Before you start
- A loaded catalog, from an Excel file or an integration. An item that is not in the catalog is not counted, unless you turn on Item Catalog Creation and Count Mode in settings. See Catalog.
- At least one branch in Branches, with the workers assigned to it in Users.
- An active count for the branch. Without an active session the phone shows There's no active count for this branch yet. See step 1.
- Credits in the bank. Opening a new count, and resuming a frozen one, are blocked when the bank is empty; a count that is already running always finishes.
- Optional: locations (physical spots) in Locations, and count scopes for the branch. Both are explained in the steps below.
Step by step
Step 1: Open a count for the branch
- Go to Management ← Branches.
- Click the Sessions button in the branch row. The Sessions Management dialog opens.
- Click Create new session, enter a name and optionally a Target finish date, and save. The session gets the status Active and workers can start scanning.
If you set a target date and it passes, the session freezes itself on the next scan. Resume session in the same dialog releases it.
Step 2: Optional – count scopes and locations
- Count scopes define which part of the catalog must be counted, for example "Supplier X" or "Refrigerated". In Branches click Count Completion Targets in the branch row, then Add New Count Goal, or Add Bulk Count Goals to create one scope per distinct value of a field. Test Conditions shows how many items the scope covers before you save. Details on the Count scopes page.
- Locations let every scan also record the shelf or area. Turn on Show Location Input Option in the counter settings; Set Location Entry as Required blocks scanning an item without a location. Details on the Locations page.
Step 3: Start counting on the phone
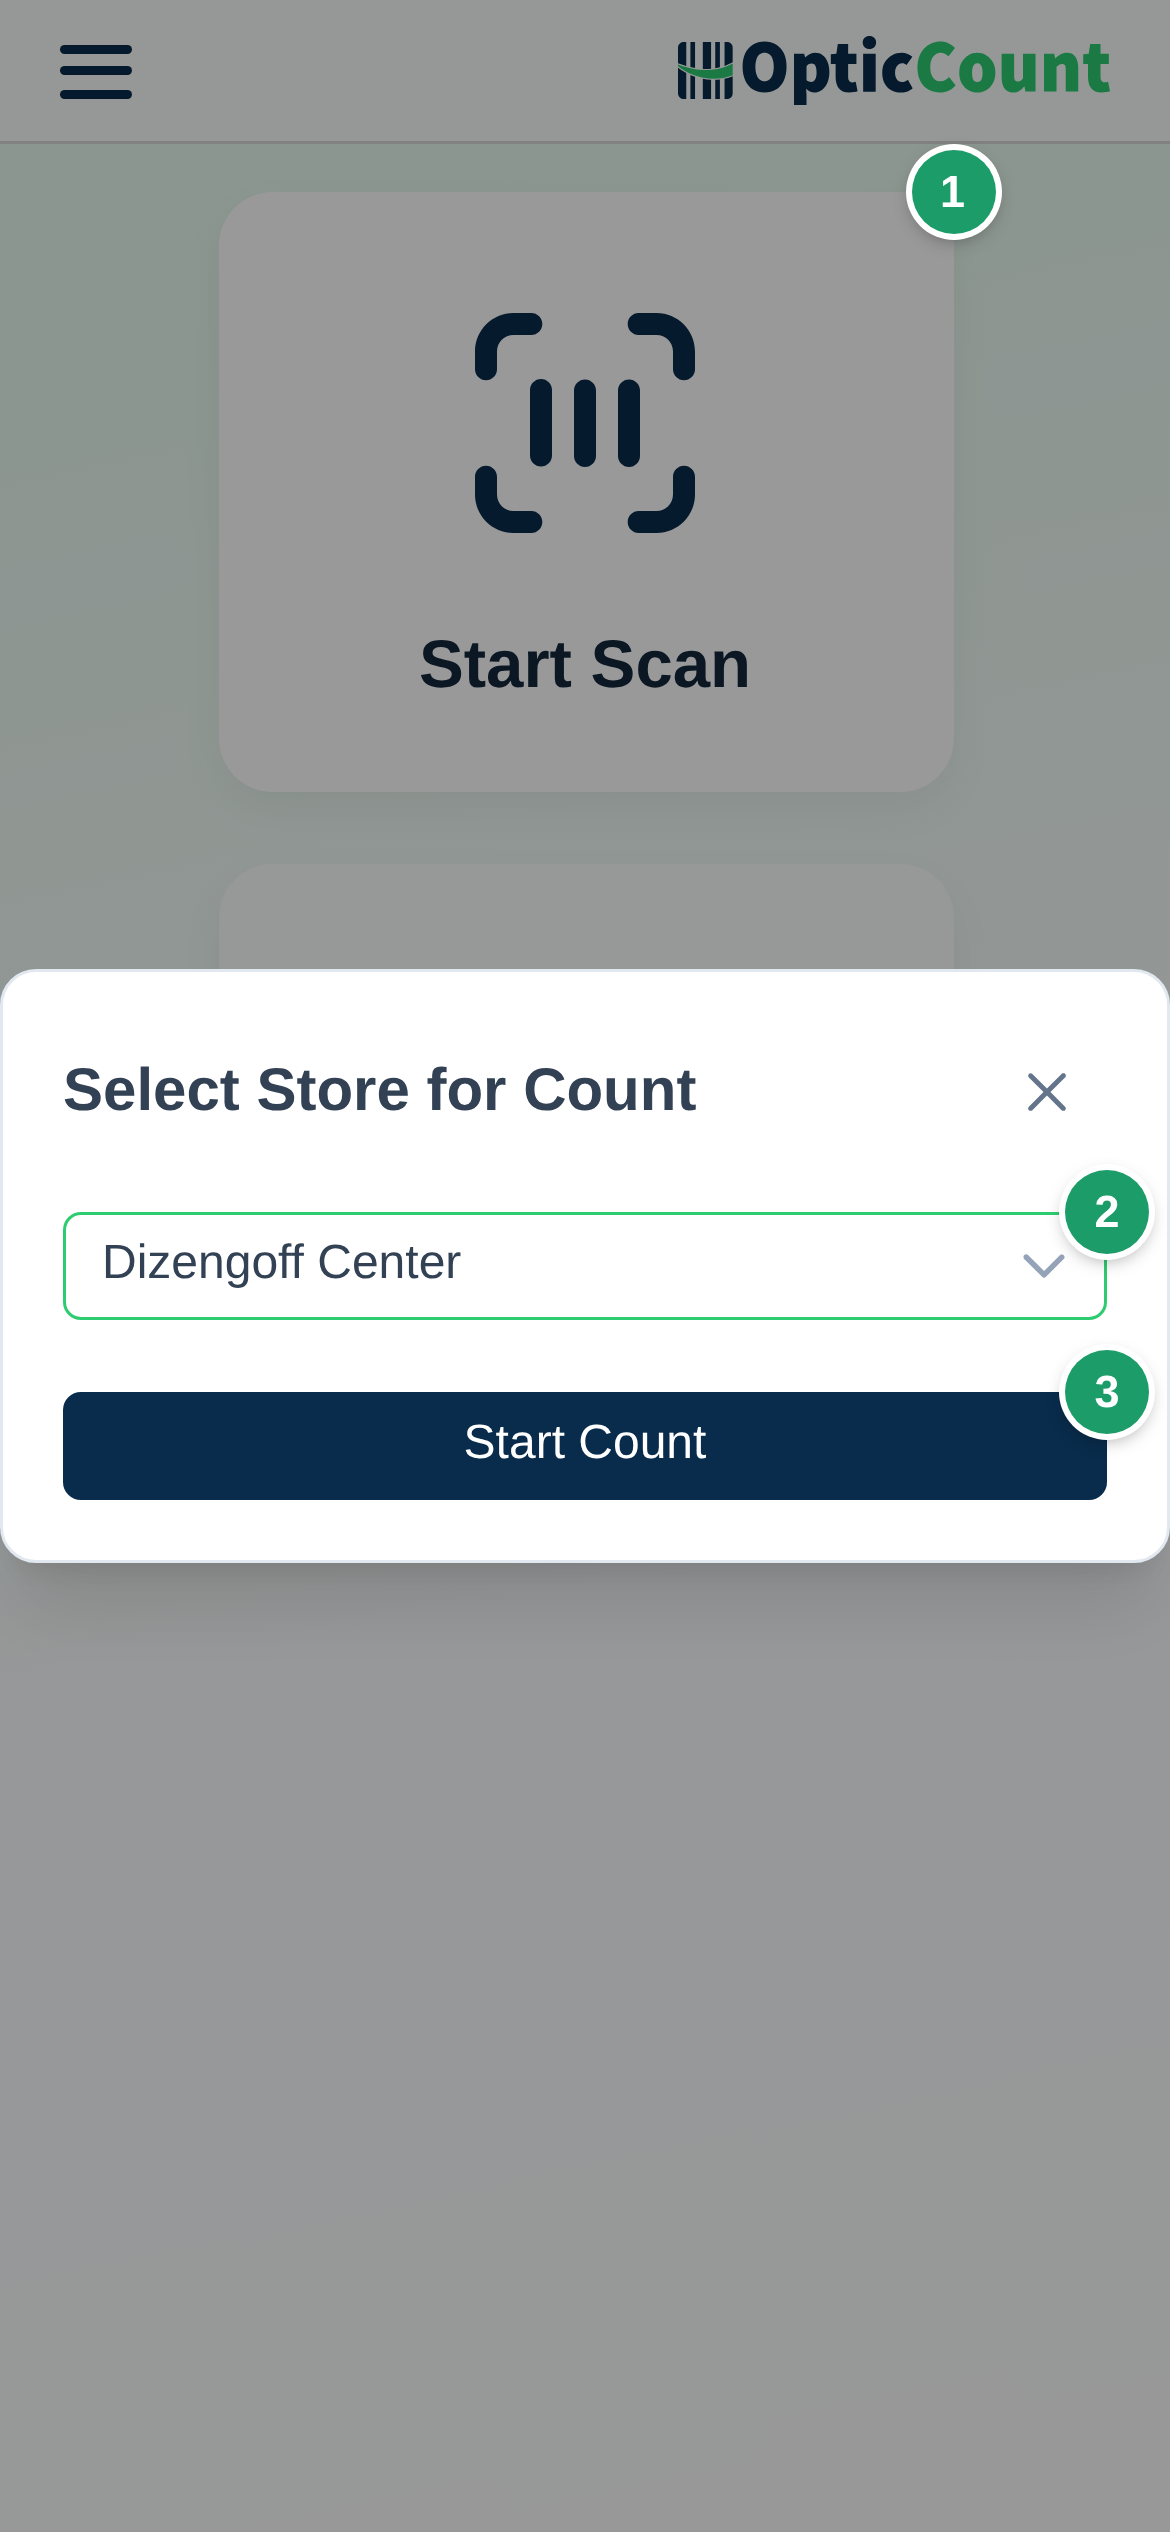
- In the main menu tap Start Scan.
- If the user has more than one branch, pick one in the Select Store for Count dialog and tap Start Count. With a single branch the counter page opens straight away.
Step 4: Scan
- Scan the barcode with the camera or a Bluetooth scanner, or type an item code or name in the Item Identifier field. The item is added to the list as a card, and the sync status changes to All counts saved successfully.
- If Show Quantity Window After Scan is on, enter the quantity in the window that opens and confirm. For an item with a package quantity you can switch between Units Mode and Package Mode, and the quantity is multiplied accordingly.
- If the item is not in the catalog, the Item Not Found in Catalog dialog opens. Pick a similar item from the list, tap Add to Catalog (permission required) or Got it to skip.
- If Show Warning for Duplicate Scan is on and the item was already counted in the branch (or in the same location), a warning appears: This item has already been counted in this store. Tap OK to add it anyway, unless Disable Add Scan After Warning Option is on.
- Optional: tap the note icon on the card (Add a note for this scan) to attach a free-text note. The icon appears only when the Scan notes setting is on.
- With locations: enter or scan a location in the Location: field, then scan the items in it. When the shelf is done, tap the finish button next to the field; the location is marked Count in this location marked as completed.
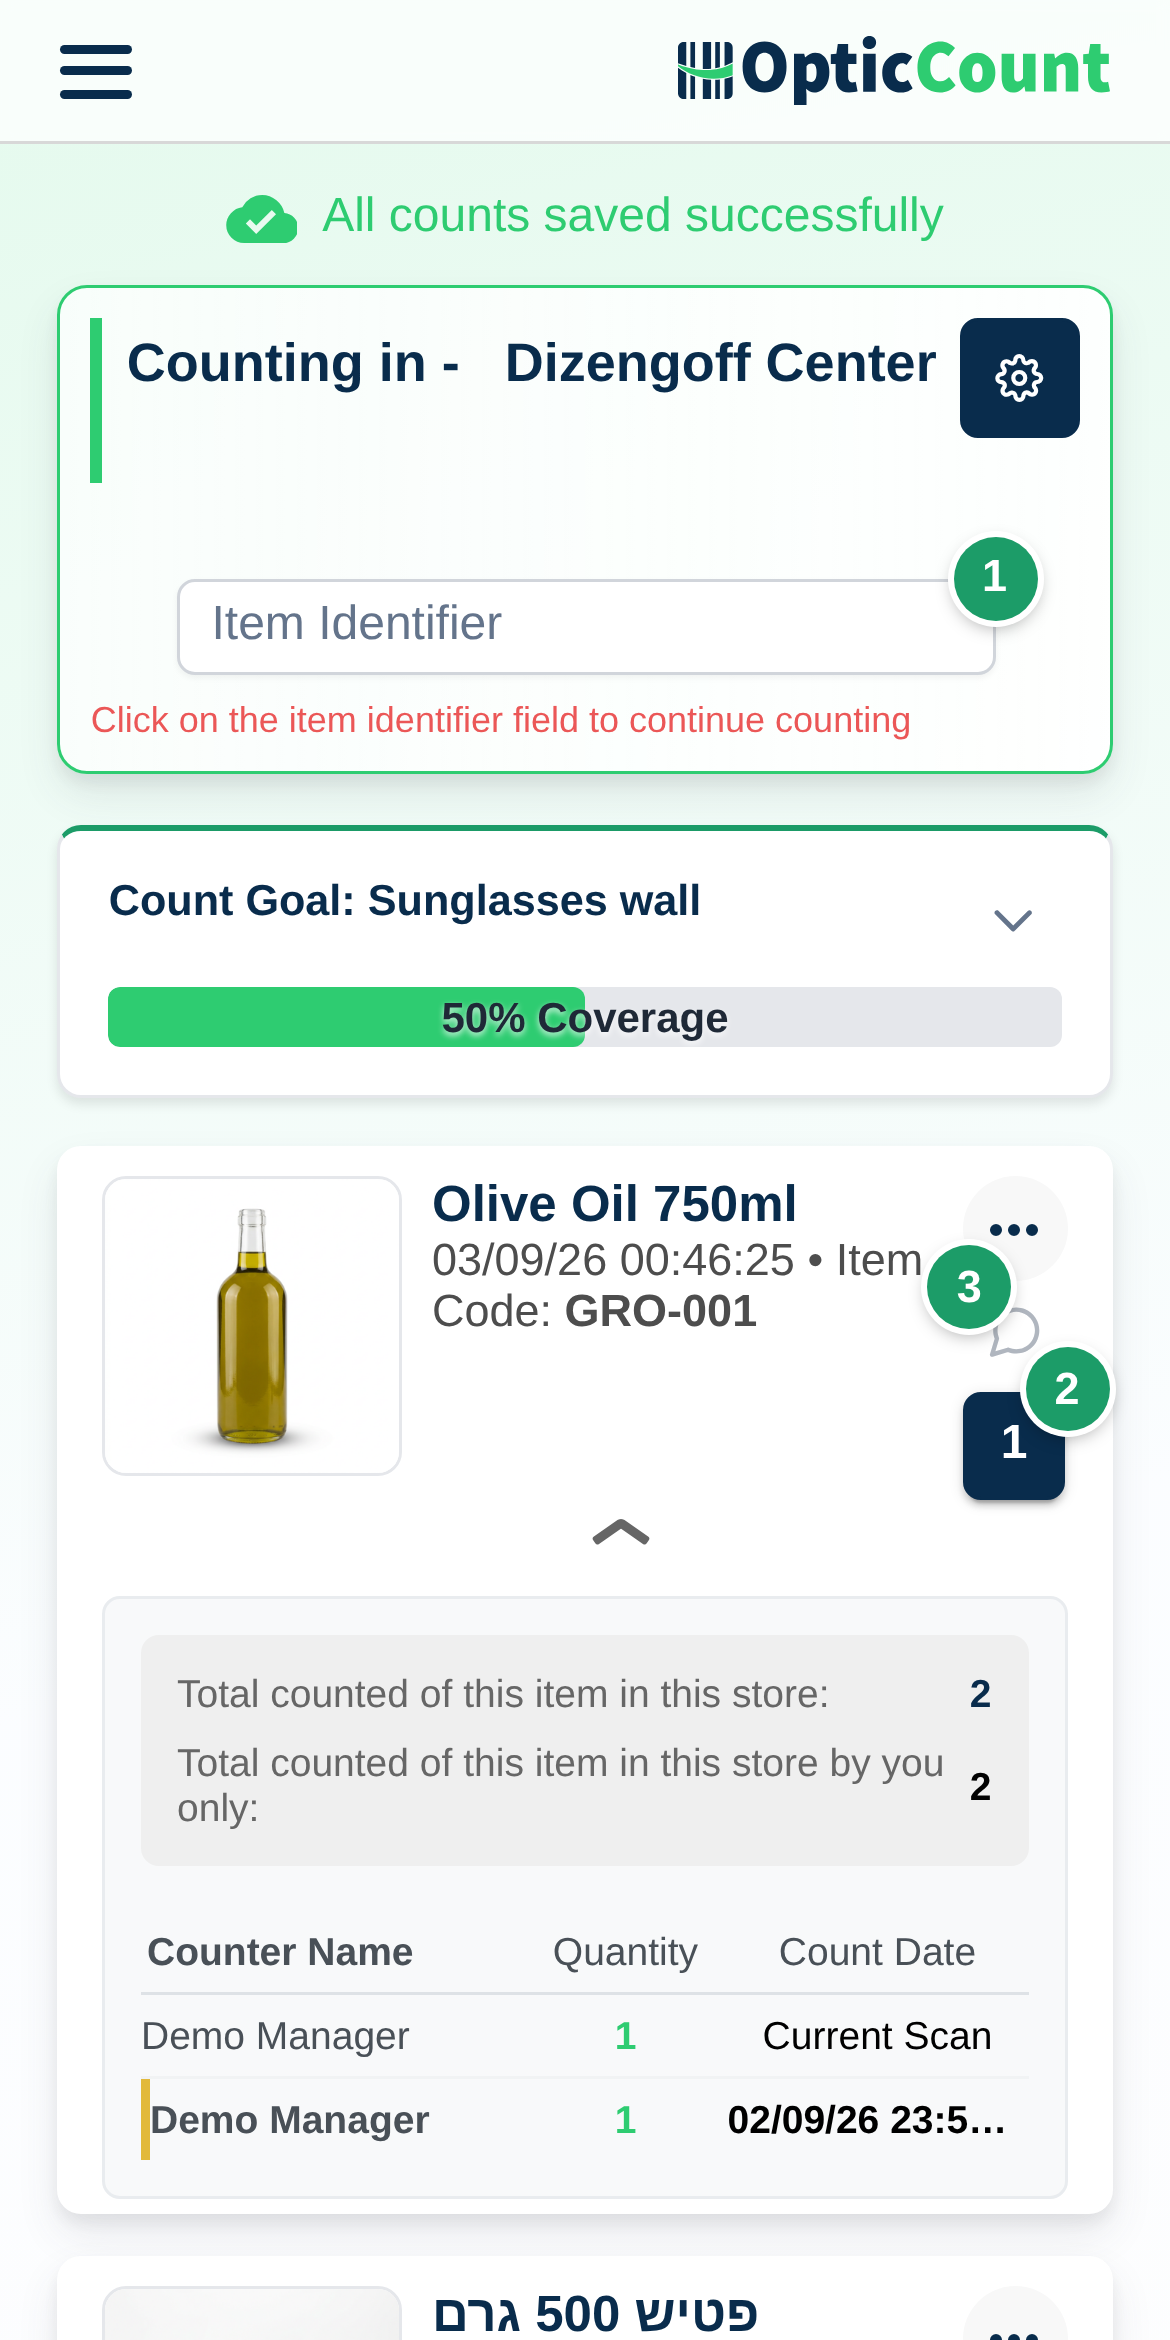 The item card also shows Total counted of this item in this store and Also counted by when another worker scanned the same item. The full page is described on the Counter page, and every setting on the Settings page.
Step 5: Track progress
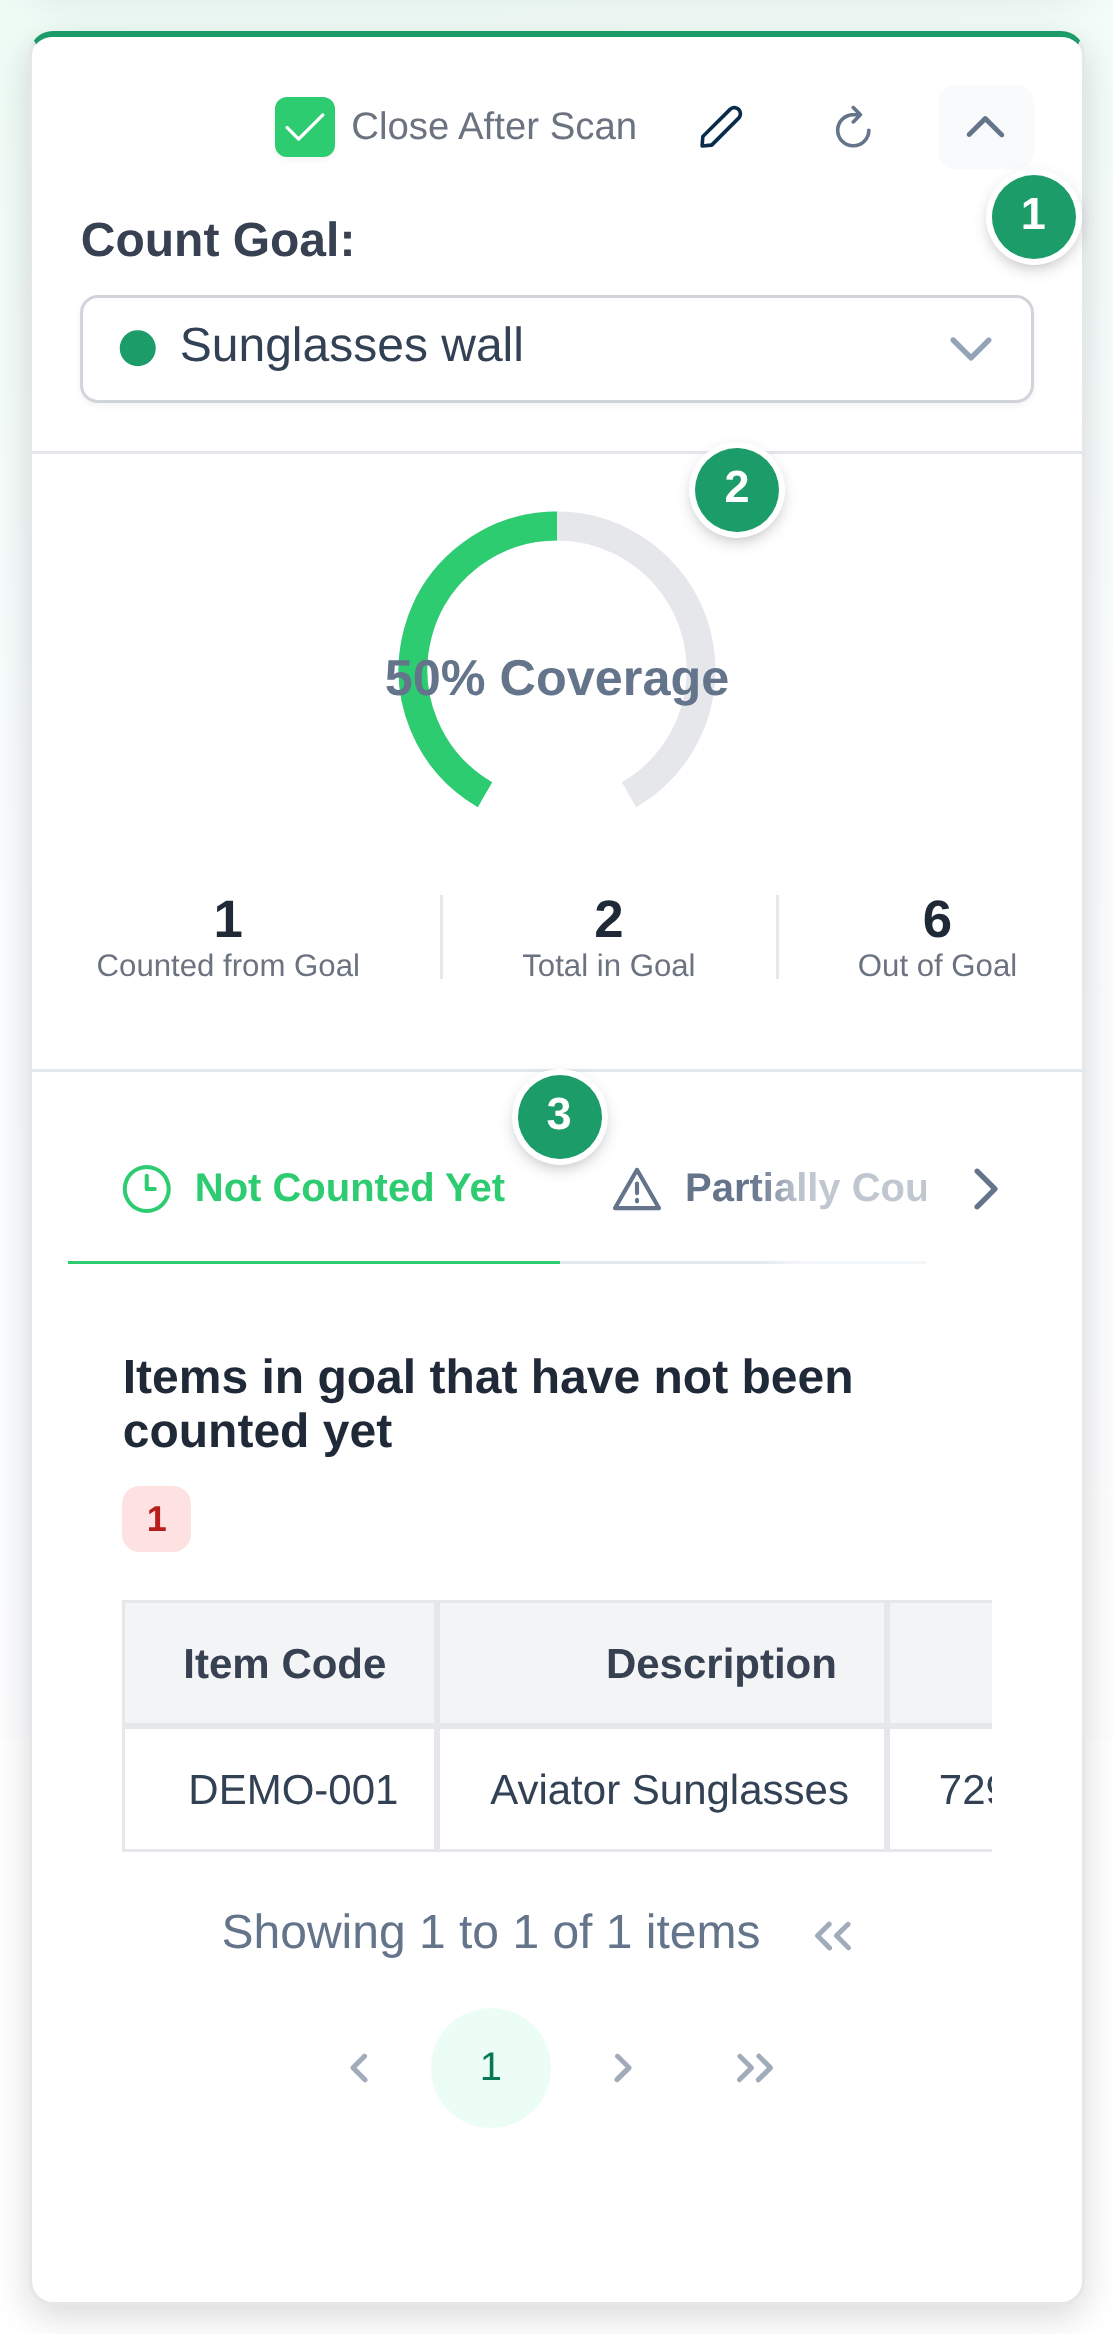
- The count-scope card appears at the top of the counter page as soon as the branch has scopes. It shows Coverage as a percentage, and in expanded mode three tabs: Not Counted Yet, Partially Counted - Variance Report and Out of Scope. Tapping an item in the first tab fills it into the scan field. The same card appears in Recent Counts for the selected branch.
- Overview brings together, for the whole company or one branch, the number of scans, the value of counted stock at cost and at selling price, each worker's contribution, and a Counting Scope group with Scope coverage and Out of scope. See Overview.
Step 6: Finish the count
- Go back to Branches ← Sessions.
- Click Finish session and confirm the message Finish the active session? After finishing, no more counts can be added. The session moves to Finished, and the data stays available for review and export.
Freeze session pauses scanning without finishing, for example over lunch or while you check variances. Set as active on an older session reopens it and closes the current one.
Step 7: Review in "Recent Counts"
- Open Management ← Recent Counts and pick a branch. Without a selection the page shows Please select a store.
- The line Total Items Counted in Selected Branch shows the overall quantity. Switch between Table and Cards to suit your device.
- Open Show Search and Sort Options and choose Merge Scans By: item code and barcode to see one row per item instead of one row per scan. When rows are merged by item, the ERP Quantity, ERP diff and Monetary diff columns appear (the difference is priced at cost).
- Fix a wrong quantity directly in the row, or delete a single scan. Merge by parent combines packages with their child items; Group by category summarizes by category.
The ERP difference is shown only when rows are merged by item. A row that is still split by location, batch, expiry or status shows a partial difference and is flagged as such. The columns are listed on the Counts page.
Step 8: Export
- In Recent Counts click Export Count Summary Data File.
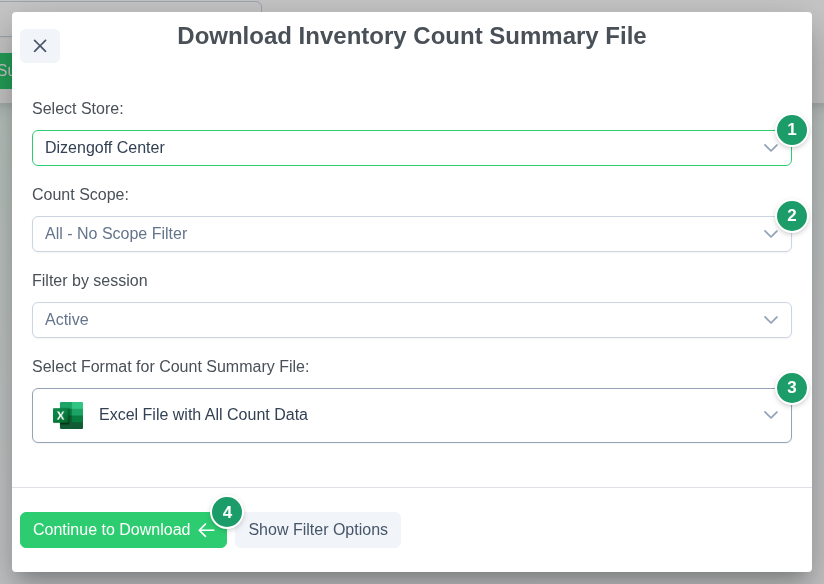
- In the Download Inventory Count Summary File dialog choose a branch, Count Scope: (or All - No Scope Filter), Filter by session and a format. The formats are Excel and dedicated ERP templates, for example SAP B1, Priority, Hashavshevet, Comax and Minisoft.
- Optional: click Show Filter Options to export only selected locations, a date range, only manually added items, only negative quantities, only items not counted, or only differences against the ERP. Return with Exit Filter Settings and Continue to Download.
- Click Continue to Download. An ERP format downloads immediately; Excel opens one more screen.
- On the Excel screen tick Merge Scans into One Row By: (item code, barcode, location, batch, expiration date, status, parent/child merge, group by category), decide whether to tick Export Entire Item Catalog as One List - Including Uncounted Items, choose the columns and click Download File with These Settings. Your choices are remembered for next time.
With an active integration an integration-export button appears next to the green one. In the Export Count Summary to Inventory Management System dialog choose a branch and click Export Count Summary to Inventory Management System; the summary is sent straight to the ERP in the structure it expects. The list of systems and formats is on the Integrations page.
Export copies, it does not close
Exporting does not change the data and does not close the session. Exporting again creates another file (or another ERP document) with the same data. Finish the session before you export so no scans land after the file.
What happens next
- Every scan is saved to the server immediately, or on the device until the connection returns. The status at the top of the counter page shows All counts saved successfully once everything is synced.
- Every saved scan costs one credit. The credits left meter is shown in the header to every user of a company on the credit bank, and when the bank runs out the You're out of credits dialog appears with a Top up credits button.
- The data of a finished session stays in Recent Counts and in the export under Filter by session. A new session for the same branch starts from zero.
- Delete Inventory Count in This Branch in Recent Counts deletes every scan of the active count in the branch, with no undo. Use it only after you downloaded a file and checked it.
Common problems
- If the phone shows There's no active count for this branch yet → open Branches ← Sessions ← Create new session. A worker sees a message pointing to the manager.
- If you see The current count is paused → in Branches ← Sessions click Resume session. Check whether the target finish date has passed.
- If you see All purchased scans have been used → top up credits in License & Purchases. A count that is already open continues; only opening a new count or resuming a frozen one is blocked.
- If you see This item does not exist in the items database → the item is not in the catalog. Check the barcode in Catalog, or turn on Shortened Barcodes in Catalog if your ERP stores short barcodes.
- If you see This item has already been counted in this store or This item has already been counted in this location in this store → this is the duplicate warning. Tap OK to add, or turn off Show Warning for Duplicate Scan in settings.
- If you see The selected location does not match the item location according to your ERP system → the ERP has the item in a different location. Check the shelf, or turn off the mismatch warning in Settings.
- If you see This item does not belong to the store your user is associated with → the worker is not assigned to the branch. Assign them in Users.
- If the export returns No counts found for this store → the selected branch or session has no scans. Check Filter by session in the export dialog.
Related pages
- Counter page – every element of the page you scan on
- Settings – tune scanning, duplicates and locations
- Count scopes – define which part of the catalog to count
- Counts – review, merge and export the results
- Branches – open, freeze and finish sessions