
Equipment Loans – how to record items going out on loan and coming back
TL;DR
Set up a borrower once, click Start Loan or Start Return on their row, and scan the items on your phone. Each borrower's balance is loans minus returns, shown in the Loan Details dialog. Every scan costs one credit.
Who this is for and when
The Loans & Borrowers module is for businesses where equipment leaves and comes back under someone's name: employees taking tools or devices, customers renting gear for an event, technicians taking spare parts on the road. A borrower is whoever holds the item – an employee or a customer, with no difference in the app.
The Borrowers tab is shown to company managers, sub-managers, and workers who were given Borrower management access. The loan and the return themselves are done on the phone, on the counter page in a dedicated mode.
Before you start
- The Loans & Borrowers module is part of your license. If it is locked, clicking the tab opens the Unlock Loans & Borrowers dialog. See License & Purchases.
- The company has a credit balance. Every scan in a loan or a return costs one credit.
- The user who scans is assigned to the branch the equipment leaves from, as in a regular count.
- The items exist in the item catalog.
- Permissions are set under Users:
| Role | Sees the tab and records loans and returns | Creates, edits and deletes borrowers |
|---|---|---|
| Company manager, co-manager, sub-manager | Yes | Yes |
| Worker with Borrower management access | Yes | Only with Allow creating and deleting borrowers |
| Worker without permission | No | No |
- Optional: turn on the Allow notes on scans setting in the counter settings to attach a note to any scan ("Returned with a scratch"). See Settings.
Step by step
Creating a borrower
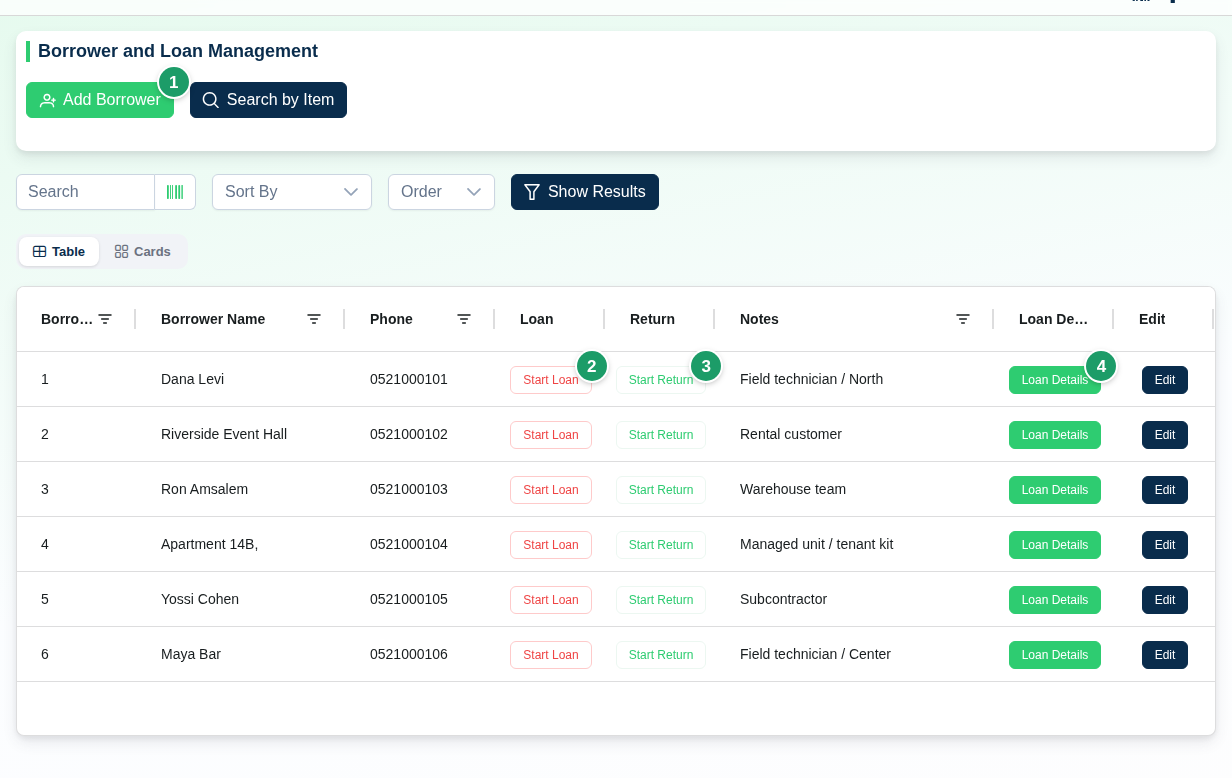
- Open Management ← Borrowers.
- Click Add Borrower. The Add New Borrower dialog opens.
- Enter a Name (required). Optional: Phone and Comment. A phone number must be unique within the company.
- Optional: pick an ERP branch. The field appears only when your integration supports stock transfers between locations. When linked, finishing a loan or return creates a matching stock transfer in the ERP.
- Click Create Borrower. The borrower appears in the table.
Recording a loan
- Find the borrower in the table. Search by name, phone or comment.
- Click Start Loan on their row.
- If you have access to more than one branch, pick one in the Select store for loan dialog and confirm. With a single branch the dialog is skipped.
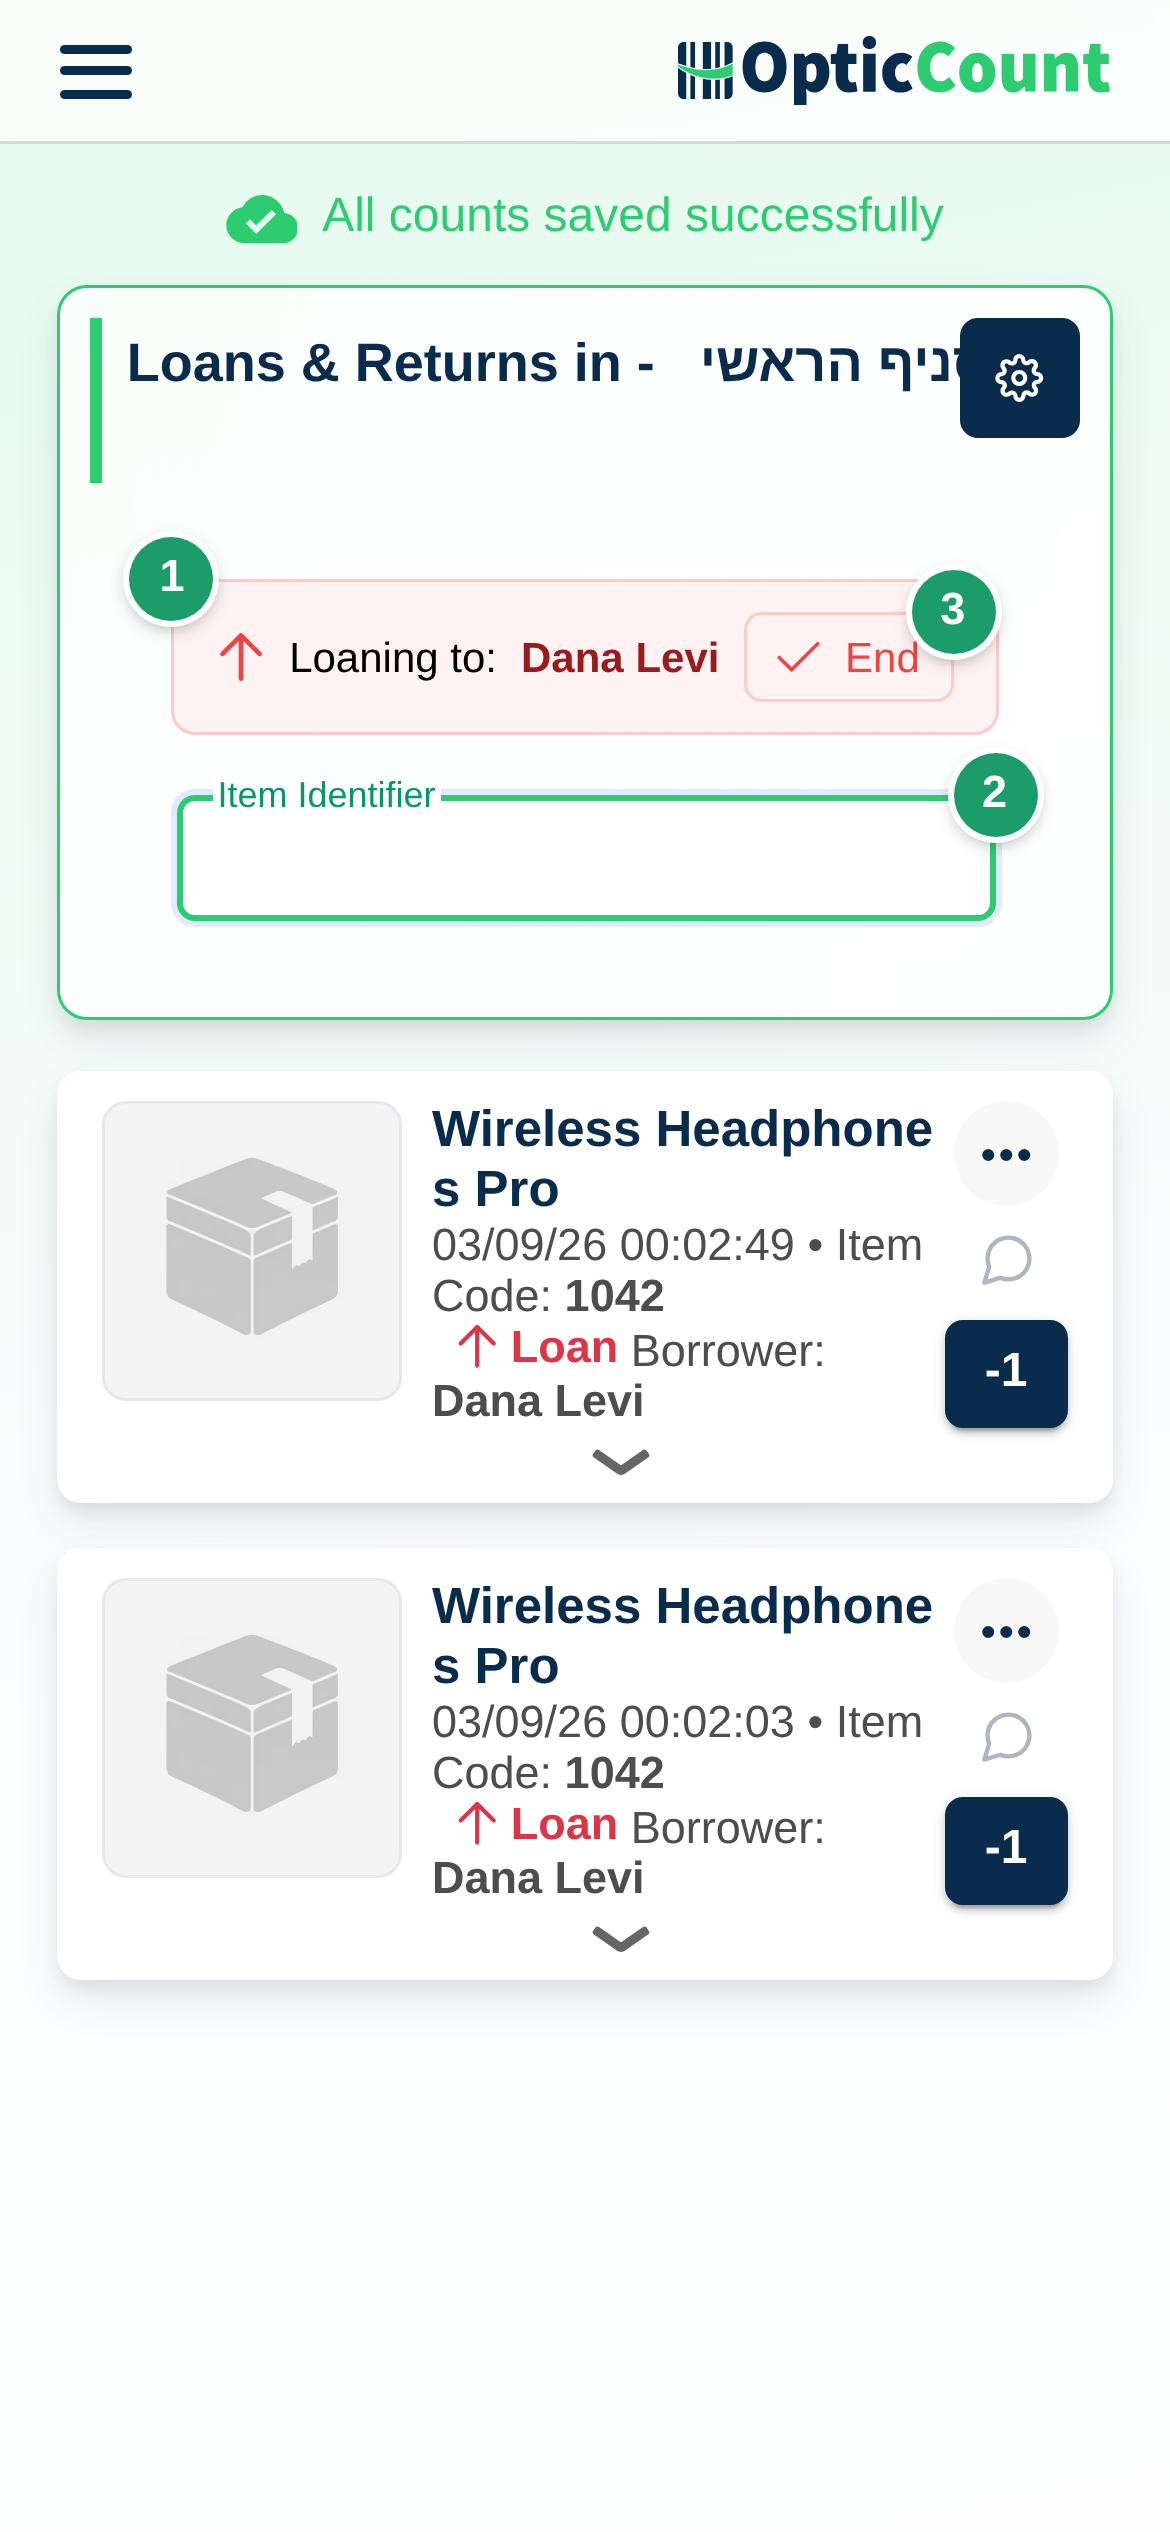
- The counter page opens. The title reads Loans & Returns in, and a banner above the scan field reads Loaning to: [name].
- Scan or type every item the borrower takes. Optional: enter a quantity if Show Quantity Window After Scan is on. The quantity is recorded as negative – the item leaves the branch.
- Optional: tap the note icon on the scan card and add a free-text note.
- Click End. The message Session finished successfully appears and the page returns to the Borrowers tab.
Recording a return
- Click Start Return on the borrower's row.
- Pick a branch if asked. The dialog title on the phone: Select store for return.
- The banner reads Returning from: [name]. Scan the items coming back. The quantity is recorded as positive – the item returns to the branch.
- Click End.
The direction is fixed for the whole session. To switch from loan to return for the same borrower, click End and go back to the table.
Checking a borrower's balance
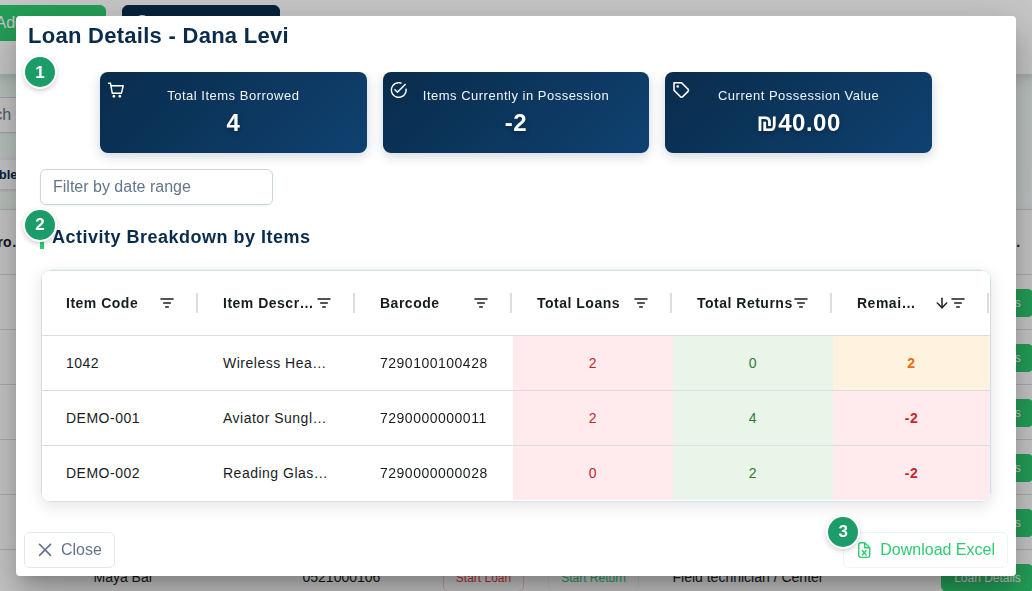
- Click Loan Details on the borrower's row. The Loan Details - [name] dialog opens.
- The summary cards: Total Items Borrowed, Items Currently in Possession, Current Possession Value (based on the catalog selling price).
- The Activity Breakdown by Items table: Item Code, Item Description, Barcode, Total Loans, Total Returns, Remaining with Borrower.
- Optional: narrow it down with Filter by date range. The cards and the table update for the range.
- Recent notes lists the scans that carry a note, marked Loan or Return. Remove note deletes one.
- Click Download Excel to download the breakdown as a file.
Finding who holds an item
- Click Search by Item on the tab. Scan or type an item ID. The item dialog opens with the Borrowers with This Item list – who holds how many.
What happens next
- Every scan is saved immediately as a count record in the branch, with the borrower's name. A loan lowers branch stock; a return raises it. The records appear in Inventory Counts.
- The balance is net: loans minus returns, per item and per borrower. A return is recorded even if the original loan was never found.
- No stock check on loan. You can lend an item even when branch stock is zero; stock goes negative.
- Credits. Every scan costs one credit. Scanning the same item again immediately after the previous scan, in the same branch, is free – so you can scan ten units instead of typing a quantity. See License & Purchases.
- ERP. If the borrower is linked to an ERP branch, clicking End creates a stock transfer in the ERP between the branch and the borrower's location, and the message Session finished — a transfer of N items was created in the ERP appears. The session ends even if the ERP fails – the scans are already saved.
Common problems
- "Please select a store" → the user is not assigned to any branch. Assign one under Users.
- You recorded a loan instead of a return → do the opposite action for the same item and borrower. The balance evens out.
- "Phone number already exists in the system" → a borrower with that phone exists. Search for them in the table instead of creating a duplicate.
- "Invalid session type" or "This version of the app is outdated for loan actions" → refresh the page and start the loan again from the Borrowers tab.
- "The session was saved, but the transfer could not be created in the ERP" → the scans are saved. Check the ERP and finish another session for the same borrower – the transfer is retried.
- "The previous attempt's result is unknown" → check whether the transfer exists in the ERP. If not, click Yes, send again.
- An item is missing from the shelf → click Search by Item. It is sometimes with a borrower.
Related pages
- Borrowers screen – look up the table columns and the borrower dialog
- Users – grant borrower permissions to workers
- Counter page – learn the loan and return modes
- Settings – turn on scan notes and the quantity window
- License & Purchases – track credit usage